You can register manually or by importing.
Table of contents
- [Method 1] Capture Japanese holidays
- [Method 2] Manually register your own holidays
- [Method 3] Import your own holidays
- How to check registered holidays?
- Precautions when registering holidays
[Method 1] Capture Japanese holidays
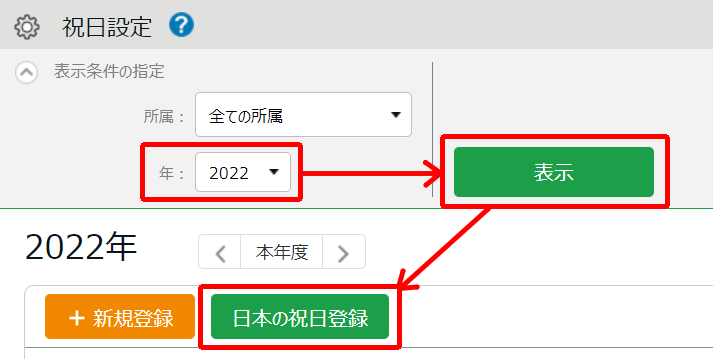
1. Open Settings> Other> Holiday Settings.
2. Select "Year" in the "Specify display conditions" area and click the [View] button> click the [Register Japanese Holidays] button.
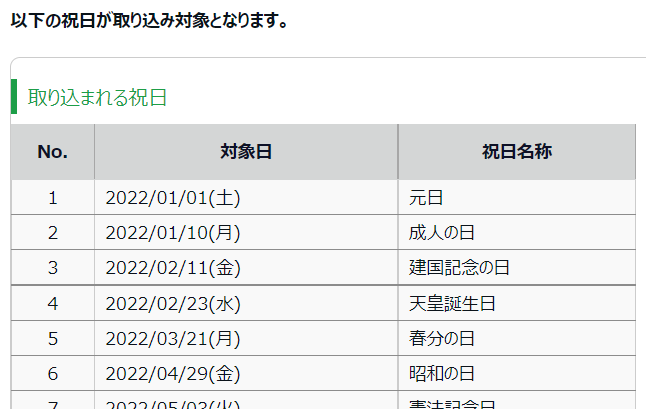
3. A list of Japanese holidays to be imported will be displayed.
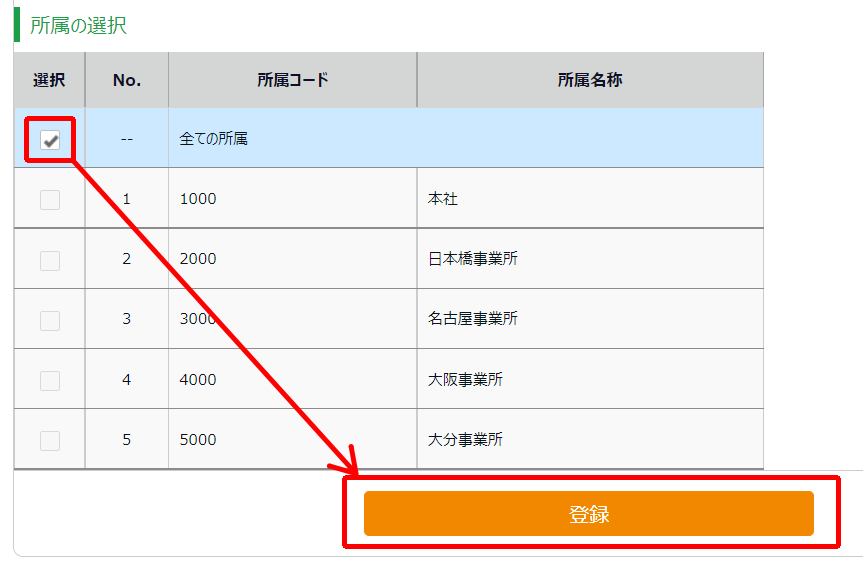
4. Select the division to apply in "Select division" and click the [Register] button.
point
・ Registration is required every year on public holidays.
・ When registering, please check the "Year" in the "Specify display conditions" area. Registration will be done for the displayed year.
[Method 2] Manually register your own holidays
1. Settings > Others > Holiday settings> Select a year in the "Specify display conditions" area and click the [Display] button> click the [+ New registration] button.
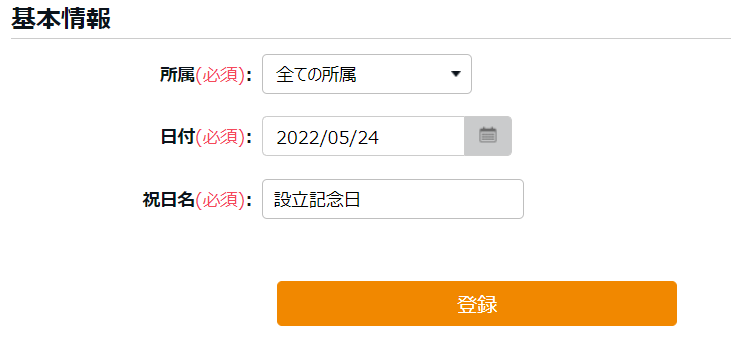
2. Enter the following items and click the [Register] button.
- Division…… Select the division to which the holiday applies.
- Date …… Set the date of the holiday.
- Holiday name ... Register the name of the holiday (founding anniversary, etc.).
[Method 3] Import your own holidays
Holidays can be registered in bulk by importing a CSV file.
1. All menus > Export / Import > "Data entry (import)" category >Click [ Holiday Data].
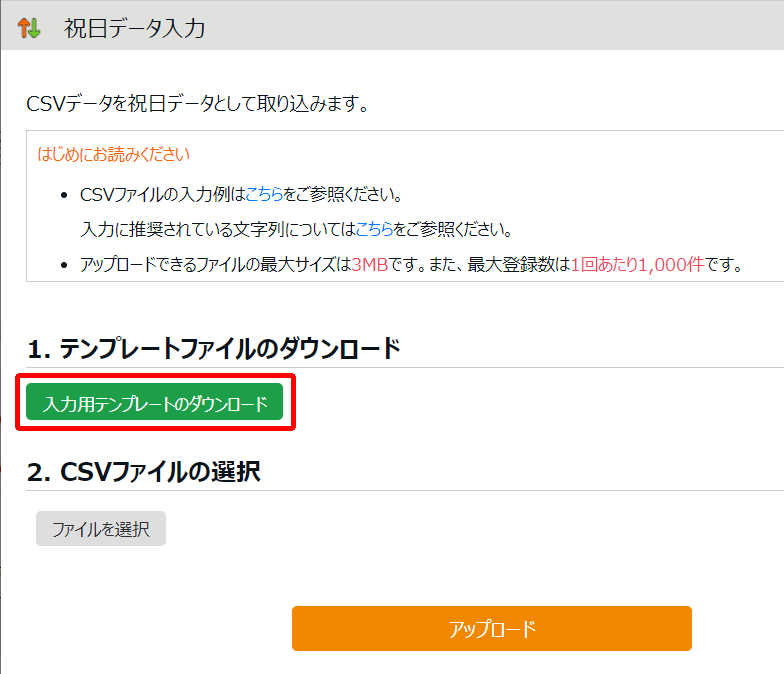
2. Click the [Download Input Template] button to download the CSV file.
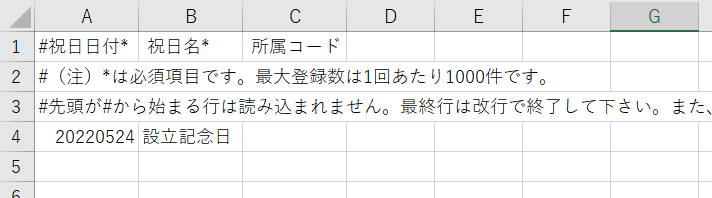
3. Enter the required information in the downloaded CSV file and save it. Please refer to the following for the input method.
input method
| Item name | explanation |
|---|---|
| Public holiday date | This is a required item. Enter the holiday date. The date format is half-width alphanumerical, and either "YYYYMMDD" or "YYYY / MM / DD" format can be imported. |
| Public holiday name | This is a required item. Enter the name of the holiday within 20 characters. |
| Division code | Enter the division code in 3 to 10 single-byte alphanumerical characters. Enter the division code of the division that has already been registered. Holidays will be set for the division specified here. If you do not enter the division code, a holiday will be set for "All divisions". |
Input example
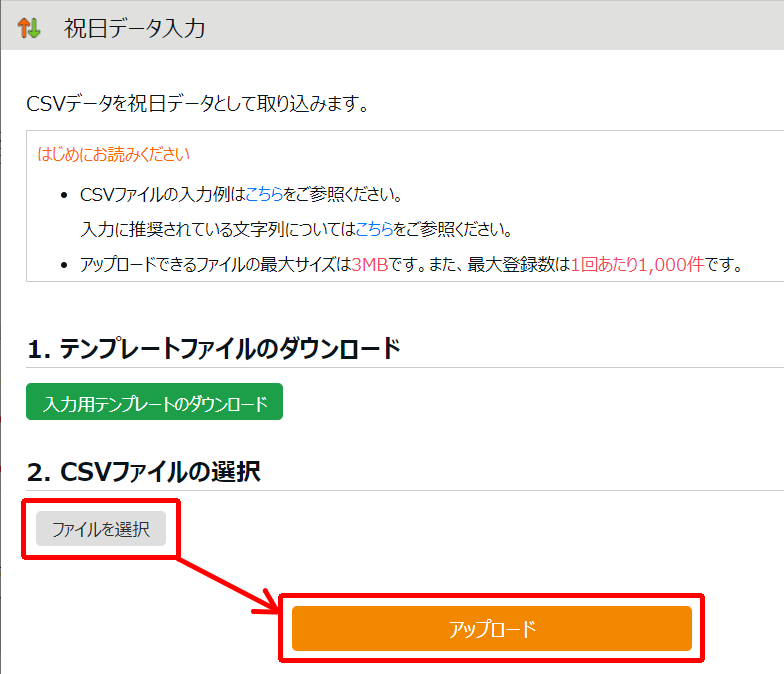
4. Click the [Select File] button> Select the import file> Click the [Upload] button.
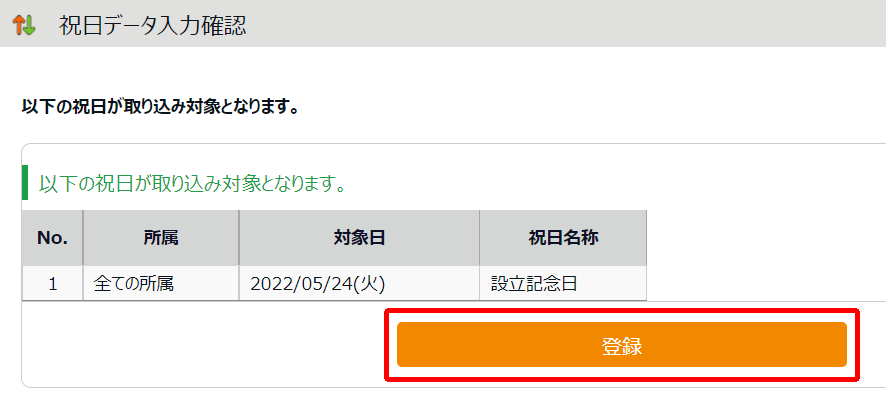
5. The import target will be displayed. Check it and click the [Register] button.
How to check registered holidays?
You can check if holidays are registered in All Menus> Schedule Management. If the date is red, you can register it as a holiday.
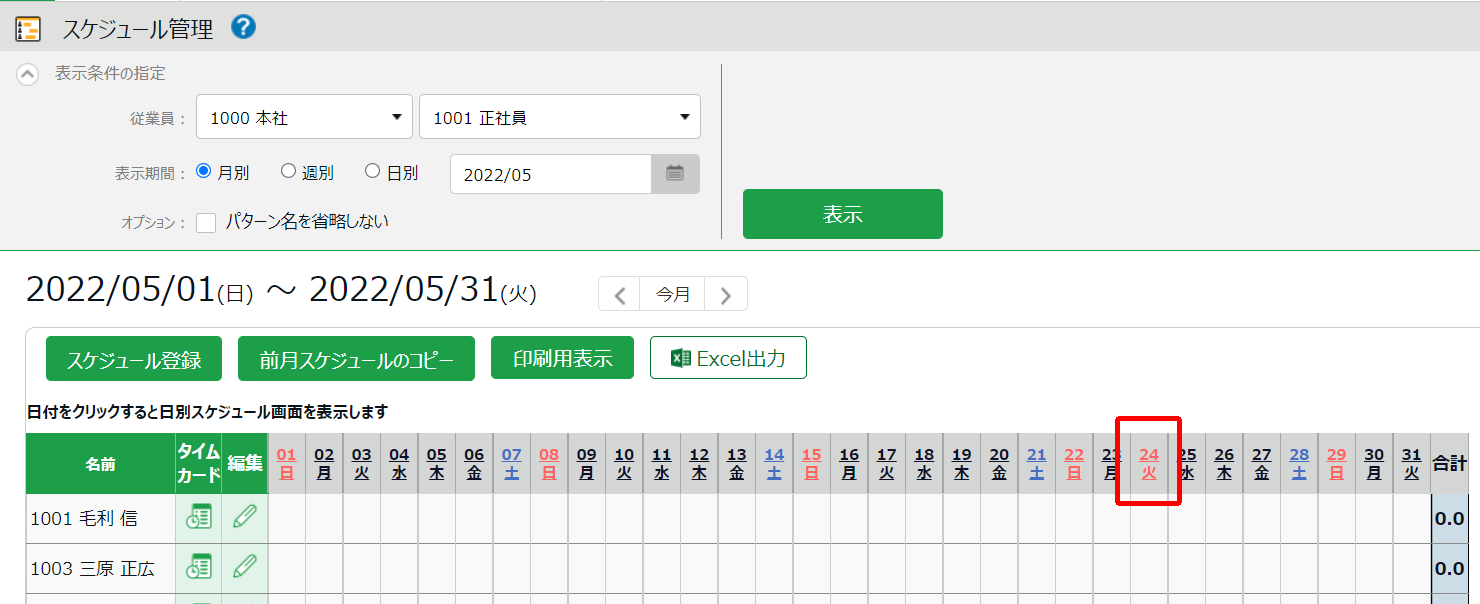
* Saturday is displayed in blue and Sunday is displayed in red.
Precautions when registering holidays
I will explain the precautions.
1. When a holiday and a Sunday overlap
Holiday settings take precedence.
If the following is set in "Automatic schedule setting" etc.
- Sunday: "Legal holiday"
- Holidays: " Non-statutory holidays "
Sundays that overlap with public holidays are treated as "non-statutory holidays".
If you want to make Sunday a "legal holiday", please delete the corresponding holiday in the holiday setting.
2. If the holiday setting is late
"Automatic schedule setting" is a specification that applies only to days when the schedule is completely empty and does not overwrite the days when the schedule has already been registered. Therefore, the date for which the schedule has already been registered cannot be overwritten even if the holiday setting is registered later.
If you want to change the date on which the schedule has already been registered to a holiday, refer to "[1] Registering the monthly schedule for each division" in this article and change the schedule manually.